Tutorial: The Live Effects Tool, by Gary Priester

The new Xara Xtreme Live Effects Tool lets you apply and edit a range of Photoshop compatible plug-in filter effects to bitmaps and vector objects. You can add more effects and edit a series of effects if you want. And because they are "live" effects, you can remove any or all at any time as well as edit and add new effects.
Xara Xtreme includes Demo versions of Alien Skin Xenoflex 2 and Eye Candy 4000 and AV Bros Page Curl. Some of these filters effects are free, but wouldn't you know the coolest filters, like those shown
below, you have to buy! The good news is, Xara has worked a deal with these companies and you can purchase the filter sets (click here) at a very
reasonable price. (I took advantage of this generous offer to buy myself the full set as a winter solstice holiday gift). I could not live another moment without the cool Lightning and Electrify filters. Can electrified worms
and lightning emitting eyeballs be far behind?
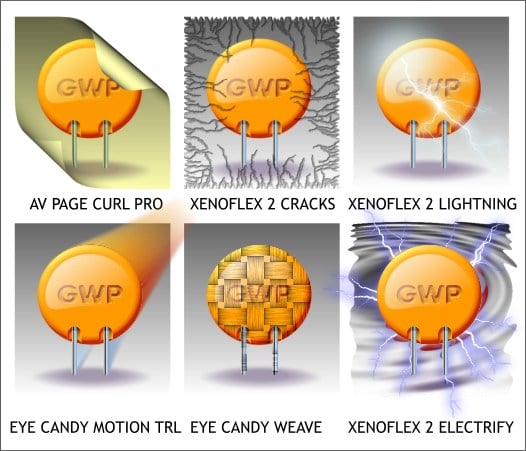
Now that you can apply filters to vector as well as bitmap objects, the sky is the limit.
You can include almost any set of filters you want though only the newer filters let you edit the current effect. I have some plug-in filters created by Renaud Gombert, Ornamente I and Ornamente II which are available for free
from the Xara Xone Shareware page (click the links to go to the pages). Some of these filters work pretty well with the new Live Effects Tool. The trick is, letting Xtreme
know where these filters are. But it is not hard.
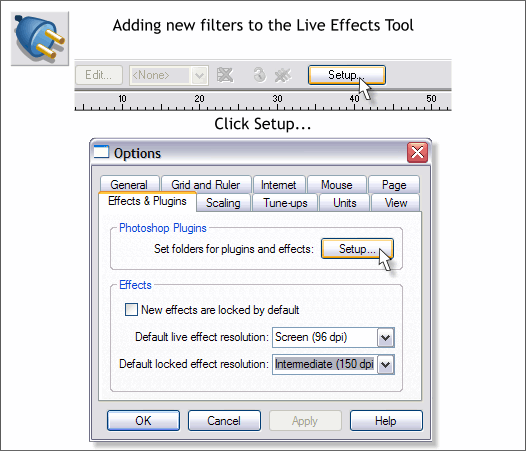
Select the Live Effects Tool (Ctrl F5) then press Setup on the Infobar. In the Options dialog, press Setup again.
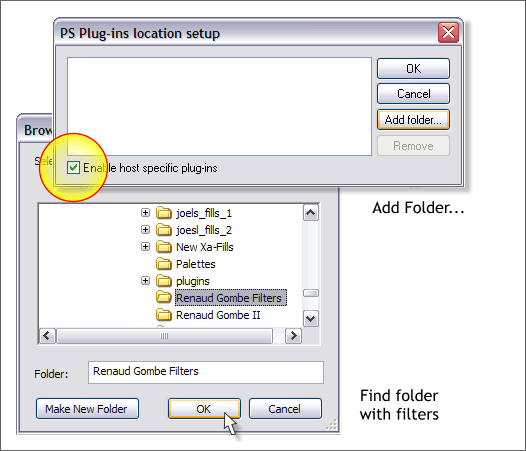
In the PS Plug-ins Location Setup dialog, press Add Folder... and then browser to the location of the folder containing the filters you want. Select the folder and press OK
. If you are selecting an older filter or set of filters, or if you are not sure, check Enable Host Specific Plug-ins.
NOTE: When you purchase Alien Skin Xenoflex 2 and/or Eye Candy 4000, the install program automatically knows where to install the filters so there is no need for the routine shown here. The
AV Bros Page Curl Pro install asks for you to specify a folder which should be the Xtreme > Xara Picture Editor > PS Plug-ins folder.
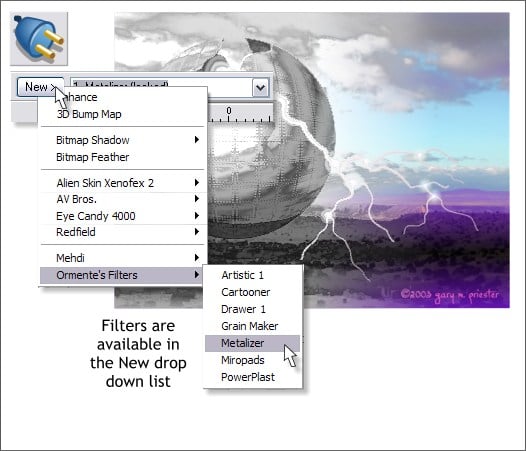
Now the Ornamente filters will show up in the Live Effects Tool > New... drop down list. The filter was applied to a duplicate image and Linear transparency applied to show the image underneath.
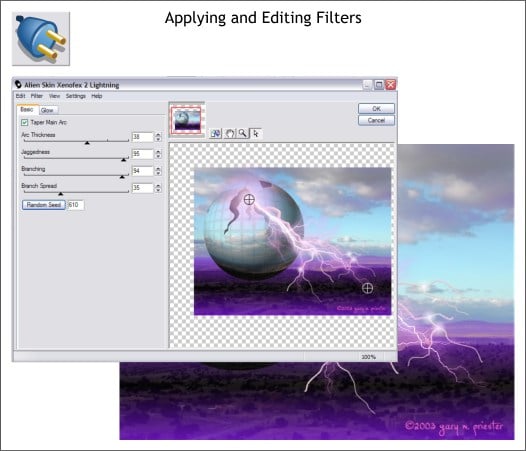
Select an object or a bitmap image with the Live Effects Tool, select a filter from the New... drop down list, in the example above Alien Skin Xenoflex 2 Lightning, edit the effect in the dialog, and press
OK. That's all there is to it.
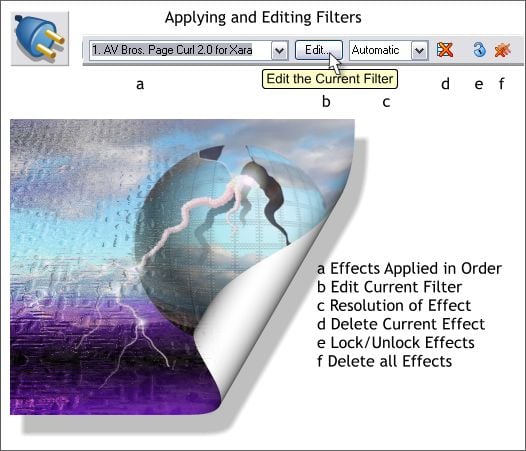
Here are some of the Live Effects Tool Infobar options. a. The Effects Applied in Order is a drop down list of effects you have applied. You can add multiple
effects to an object or image and then select any of these in the drop down list to modify or delete. b. Edits the selected filter. c. This drop down list lets
you specify the resolution for the applied filter. For print work use a higher setting. For greater speed and for the web, use the lower dpi setting. You can
use the lower resolution until you are happy with the effect and then switch to a higher resolution. d. The red X deletes the current effect. e. The lock
icon locks and unlocks a filter effect. If you do not want to accidentally delete an effect, lock it. You can always unlock it if you change your mind. f. Deletes all applied filter effects.
�2006 Gary Priester from the Xara Xone
| 
