What was new in Xara Xtreme Pro 3.2 since Xara Xtreme Pro 3.0
Xara Xtreme Pro is the flagship of the Xtreme range, adding high end features requested by Xtreme's active user base of professional designers. The 3.2 update contains a large number of useability improvements, particularly to fill, color and text handling, as well as new features such as RAW and XPS filters (Microsoft's new rival to PDF), and improvements to existing features such as PDF import and export and Vista compatibility. For more details read on... - Bitmap and Photo Handling Improvements

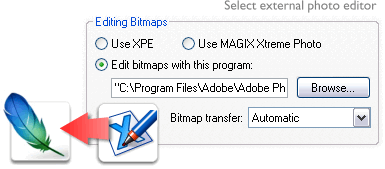 Xtreme now integrates with external photo editors. Double-clicking on a photo (or bitmap fill) will open the image in your favorite* photo editor, where you can edit the photo as required. Clicking save automatically updates the image back into Xtreme.
Xtreme still contains the Xara Picture Editor as the default photo editor, but is now also bundled with an alternative Magix photo editor.
* This feature has been tested with Adobe Photoshop CS, Corel Paintshop Pro X and Gimp.
There are a number of other significant photo handling improvements:
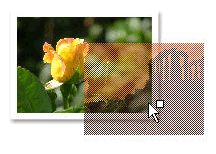
Photo Drag and Drop - more info
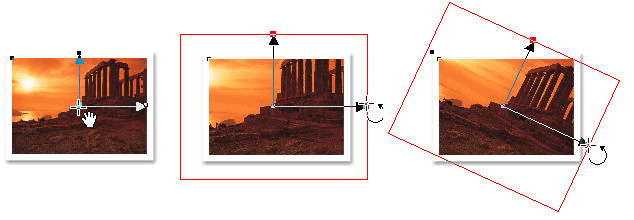
Photo resize, rotate, and push - more info
- Smoother, Faster Zoom

We've enhanced the scroll wheel zoom so it's much smoother, less flickery and faster. For those that prefer to have the scroll wheel zoom always, there's a new option to make the scroll wheel always zoom in and out, rather than document scroll (useful if you're working on photos a lot or single page documents). In combination with scroll wheel press (to pan documents) this provides a really, really efficient, keyboard-less way to zoom and pan around your documents.

- Faster Document Scrolling

We've also enhanced the document scrolling using the mouse wheel to make it accelerated. So scrolling through larger documents is now a lot quicker and more efficient. - Color Handling Enhancements

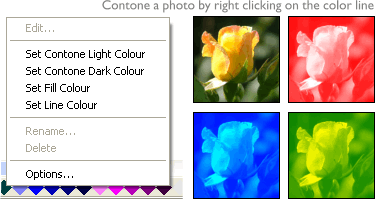 There have been significant changes to the way colors are handled, removing clutter from the UI and introducing some quicker ways of working, altogether making it simpler, cleaner and more productive. Changes include:
New Standard Palette - more info
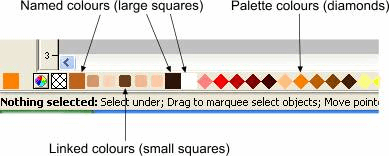
Named Colors - more info
Automatic removal of unused colors - more info
Linked Colors - more info
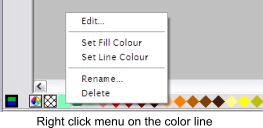
Right click on color line - more info
Re-ordering colors - more info
Smart object coloring - more info
Bitmap Contoning - more info
- Improved Fill Handling

As you know the single click-and-drag method of creating graduated fill and transparencies remains a key benefit of Xara Xtreme. We've now added the ability to push the fill (retaining the relative positions of the end points) within the shape. You can either just drag anywhere on the fill arrow - the whole arrow moves, or hold Shift while dragging. So now with a single click-drag you can set the start, end and angle, and another click re-position the fill as required. • When dragging on the ends of the fill arrows (or transparency fill arrows) it now preserves the aspect ratio of the fill. Hold Shift to squash or skew the fill. • It's now easier to find fill handles. In other words we've increased the hit radius when dragging near the ends of the fill arrows, making it less fiddly to adjust the ends.
Automatic Select Inside - more info
- Vista Compatibility


This release is now fully operational under Windows Vista e.g. it can be used from non-Admin accounts (on both Windows XP and Vista). - New Key Shortcuts

• Holding down space bar now does a temporary switch into the Push tool. • Plain numeric 1, 2, 3, 4 set the zoom to be 100% to 400%. Number 5 key sets it to be 50%. • Ctrl+W closes the current document, as is becoming an industry standard.
There are a large number of key short cuts in the Text tool � detailed below.
- Copy / Paste to / from Microsoft Word

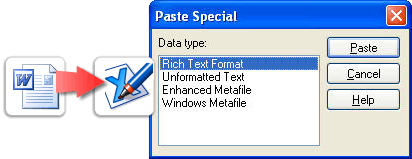 You can now copy 'rich text' from other applications such as word processors and paste into Xtreme as text,
and the fonts, margins, line spacing will be preserved. This makes it dramatically easier to retain the style and appearance of your text.
When you paste 'Rich Text Format' from other applications you are given the choice of pasting the text in as 'Unformatted Text' which means it will appear in the font and style at the cursor where you paste, or Rich Text Format which means it will retain the style of the source text.
This also works the other way around. You can copy text in Xtreme and paste into other applications that support rich text editing and the style (font, size, colors, margins etc) will be retained.
Some applications, such as Microsoft Word, have a 'Paste Special' menu option that provides a wider range of paste options. These applications will sometimes allow you to choose the format of the pasted object (text or graphic). - Right Drag Copy

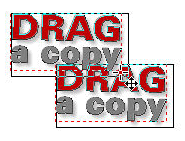
Copying objects on your page is a very common operation when creating graphics, and Xtreme now makes this easier than ever before. In the Selector tool if you right-drag, then the object will not be moved but copied instead.
What's more, while dragging (with the right mouse button held down), each time you click the left button a copy of the dragged object is dropped at each click. - Easy Rotate

To accompany the new easy ways of copying objects there's now an easier way to rotate objects without having to go into Rotate mode.
Whereas before, you had to click on an object with the Selector tool to toggle between resize mode and rotate mode, now if you're in resize mode (the normal mode) if you hold the mouse-pointer just inside the corner selection handles (see illustration) then the pointer changes to indicate that dragging will now rotate instead of resize.
So now you can resize and rotate all objects on the page without having to toggle between rotate and resize mode. - New Import and Export Options

RTF - Rich Text Format - more info
EMF - Extended Metafile Format - more info
RAW photo import - more info
SVG Export - more info
XPS � XML Paper Specification - more info
- Text Tool Enhancements

There have been a large number of improvements to the text tool:
Smart Quotes - more info
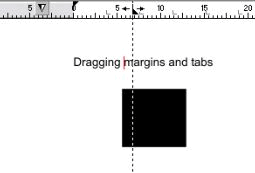
Guideline when dragging tabs and margins - more info
Soft and hard hyphens - more info
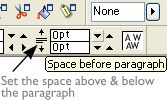
Paragraph Spacing - more info
Paragraph Select - more info
Word count: Text Tool Status Line - more info
Optimized text placement - more info
Lorum Ipsum - more info
Swap case - more info
Increase / decrease text size - more info
Manual Kern Key Changes - more info
Special characters - more info
- Editing Rounded Corner Rectangles

Rounded corner rectangles can now be resized in the rectangle tool (including aspect ratio changes) while maintaining circular corners (resizing in the Selector tool will still permanently transform the corners so they are not circular, as before). - New Templates

A large collection of new top quality editable templates including more greetings cards, newsletters and calendars, plus new categories such as photo albums and collages, newspapers, documents, certificates and coupons.
See new templates
