© Xara Group 2008


Frame 2
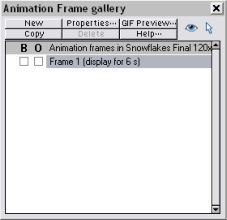
In the Frame Gallery. Select Frame 1 and click Copy to
create the second frame that is an exact copy of the first.
Move the two groups of flakes vertically down the frame.
Increase the size of the flake groups (by about 200% in my
example).
To give some randomness to the movement of the snow
flakes, Ctrl + click to select individual flakes inside the
groups and adjust their transparency and position. You can
also rotate each flake by 180 degrees - the easiest way to
do that is to enter a value of 180 in the angle of field on
the top Selector Tool InfoBar.
Change the Color
Our animation fades from blue to an
orange-red color. If we were to simply
edit the Theme Color 1, then all
graphics, across all frames would
change color. So we need to be a bit sneaky to create a
second Named Color.
The first stage is to edit the Theme Color 1 to be your
required second color. Just right click on the Theme Color 1
on the Color Line and select Edit. After you’ve made your
change, Select All on the Frame 2 (Ctrl+A) and copy this to
the clipboard. Then undo the color change you just made -
you may have to Undo twice to get back to the blue colors.
Now delete everything on Frame 2, and Paste in Place
(Ctrl+Shift+V) which puts the re-colored graphics back on
Frame 2. You now have two Named Colors on the color line
and you can now change the color of all
the graphics on Frame 1 and 2
independently.
Move the text
The ‘Seasons Greetings’ text is invisible
still, so go into Outline View so you can
see it. Enlarge and re-position it, and
adjust the Transparency to be 0%, so it
should look like this on the left.
Now is a good time to preview
your animation. Click on the
Preview Flash icon on the top
animation toolbar and hopefully you will
see something like this. Not bad for a
two frame animation.
One last thing for Frame 2. I introduced some transparent
text immediately under Seasons Greetings (my text says
‘from all at Xara’ across two lines), which I want to fade
in to end my animation.
So create your text, make it small and completely
transparent, and give it a name, as described before, say
‘FinalText’. I have placed it in the center of the image,
but you can make its start position anywhere.


Xara Xtreme - Xmas Flash Animation -3-

Select Frame 1 and click Copy to create Frame 2
The final image for Frame 2
(The Outline view shows the tiny
transparent text in the center, that will
expand in the final Frame 3)